Page 1 of 2
modified hammer (pic inside)
Posted: May 14th, 2011, 1:36 pm
by 7AZC4
Great message board - I've learned quite a bit on the P64. I carry my pistol daily, and after reading of the NDs/ADs it got me thinking. I always carry with a round chambered and the safety off. Carrying a P64 with the safety on, especially one that has to be pushed upwards to access the fire position, is not an option for me. In a highly stressful situation, where a split second could be crucial, the last thing I want to do is manipulate the safety. I've had firearms training in the military and law enforcement and I fully appreciate how fine motor skills can be a problem during stress.
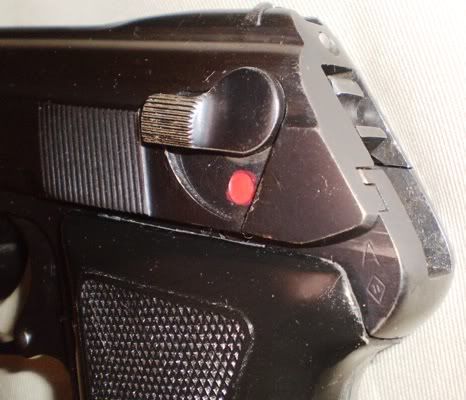
I really like the P64 for daily carry. At the same time, I believe in "Murphy's Law." Even though I've not dropped my pistol, nor do I think I'll drop my pistol, I know the lack of a fail-safe hammer block can be tragic when Murphy rears his ugly head. I decided to remove the metal of the hammer that protrudes from the back of the slide. Now, it will not be possible for the pistol to fire if it is dropped and impacts directly on the hammer area. I use the following Wolf springs in my P64: 19lb spring, recoil spring, and firing pin spring. Removing the exposed hammer area has not affected shooting reliability whatsoever.
The P64 is a great pistol - but, I think of it only as a tool. And this tool just got a little better for me.
Dan

Re: modified hammer (pic inside)
Posted: May 15th, 2011, 7:36 pm
by manicmechanic
How about a pic with the hammer cocked. That was the triangular hammer, not the round correct?
Re: modified hammer (pic inside)
Posted: May 16th, 2011, 4:57 pm
by 7AZC4
It was the round hammer. When I have access to my camera again, I'll post a pic of the hammer cocked.
Dan
Re: modified hammer (pic inside)
Posted: May 16th, 2011, 6:09 pm
by rick9plus
I guess you can do that sort of thing once you replace the springs. No way I can accurately shoot that first DA pull with stock springs. I've got to cock the hammer manually to be accurate on the first shot!
Re: modified hammer (pic inside)
Posted: May 17th, 2011, 10:42 pm
by benheart
Ummm....... wow. I'm surprised reducing the hammer mass didn't affect reliability. If It's 100% reliable, it's kind of an ingenious solution. I would be afraid to try it myself.
Re: modified hammer (pic inside)
Posted: May 18th, 2011, 12:26 am
by juniustaylor
Doesn't look like a whole lot of mass was lost. He said it was a round hammer and by the picture he just had to chop off the rounded part. Maybe a few grains of mass lost. Looks pretty slick but the round hammer doesn't protrude much to dig into the side-meat as it is. However, it does look slick.
Re: modified hammer (pic inside)
Posted: May 20th, 2011, 9:16 pm
by benheart
If I read the original post correctly, the reason to chop the hammer does not have to do with a hammer biting into "flank steak", it's to prevent the firearm from accidentally discharging if dropped. Have you had a chance to test fire it?
Re: modified hammer (pic inside)
Posted: May 21st, 2011, 12:13 am
by juniustaylor
You are correct ben, I was just throwing that out there. Some folks that carry IWB will change out the triangle shape for the round profile.
Looks like the cartridge indicator pin is missing. I have a spare hammer, I think I'll do this with mine. I bought it cheap and turned it into a round one since it was triangle. I think I'll just hack it with the Dremel. I'll post some pictures.
Re: modified hammer (pic inside)
Posted: May 21st, 2011, 1:01 am
by juniustaylor
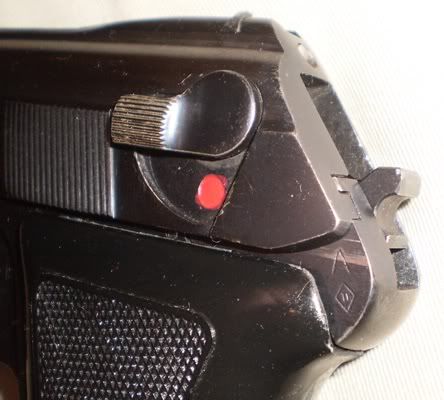
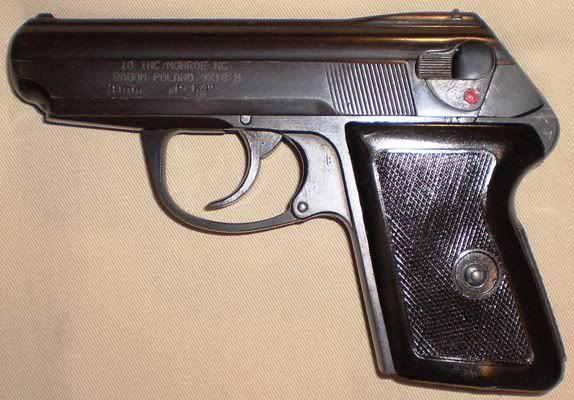
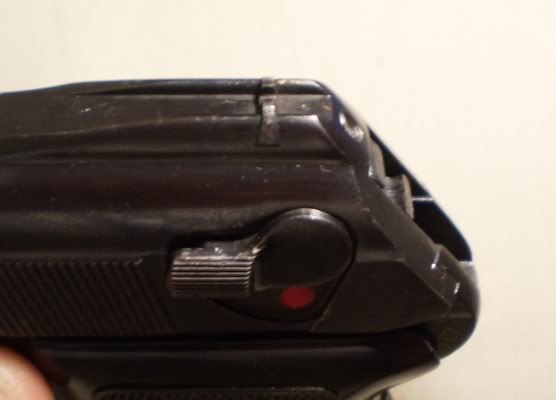
My pictures... Took about 15-20 minutes. That was removing my old hammer, putting in my spare, marking, removing, cutting, re-blue, reinstall. Pretty simple process. Easiest way to remove a hammer is to do the old paperclip trick with the main spring / hammer strut hole. Then remove the hammer axis pin and remove the hammer. To reinstall, put the hammer in place, line it up with the hole (making sure the hammer strut is in the hammer correctly), put the pin in, cock it back a tad just to remove the paperclip and release.
Re: modified hammer (pic inside)
Posted: May 21st, 2011, 1:14 am
by juniustaylor
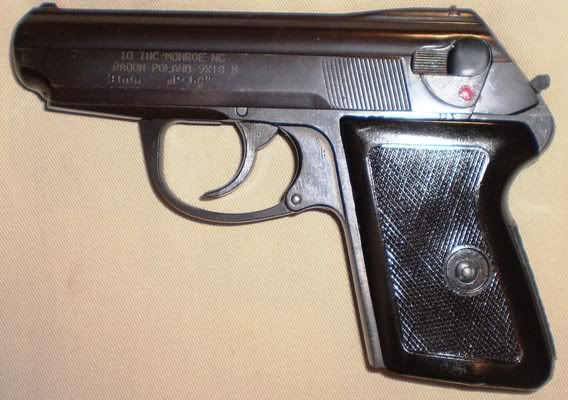
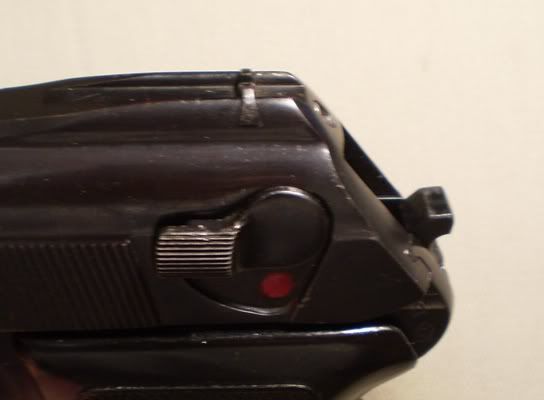
Different angle.
Re: modified hammer (pic inside)
Posted: May 21st, 2011, 1:20 am
by juniustaylor
You can let the hammer fall using your thumb so it doesn't have to smack the safety to prevent unnecessary blows. In the pictures my hammer doesn't look like it was cut square across but I can assure all that it is cut square. I'll take it out in a few days to see if it'll go boom every time. I use a 17# hammer in this gun with no ill-effects (ie, no magazine popping out after last shot, light strikes, etc.). I've got some Silver Bear I can blast through it. Do have some reloads also I can shoot as well. I'll check it out and post back.
Re: modified hammer (pic inside)
Posted: May 21st, 2011, 5:33 pm
by juniustaylor
Blasted through an entire box of 50 Silver Bear and a couple reloads. Zero defects. All rounds went boom the first time. This was with a 17# mainspring that I always use. So, certainly if a 17# spring can do it with a lighter hammer, then I'd say 18# plus should work just fine also. Still didn't observe any magazines falling out either. I'd trust this gun for SD purposes with the modified hammer.
Re: modified hammer (pic inside)
Posted: May 27th, 2011, 7:05 pm
by lklawson
Thanks for the work & updates.
Now I'm thinking about looking for a triangle hammer to hack.

peace favor your sword,
Kirk
Re: modified hammer (pic inside)
Posted: May 29th, 2011, 5:49 pm
by blinddog
I have a spare hammer, I think I am going to give this a try. It really looks great and it works! Great pics BTW.
Re: modified hammer (pic inside)
Posted: May 29th, 2011, 10:16 pm
by juniustaylor
It's pretty simple really. With the hammer decocked, use a pencil or other marking device to mark the slant of the slide. You'll find it basically involves cutting the circle inside the hammer almost exactly in half. Once you have made the mark, remove the hammer and use a dremel or hacksaw. Reinstall the hammer, check for fit and make any needed changes. Mine was virtually perfect with the first cut, just did a bit of smoothing out and reblued. Taking just the hammer out is easy if you follow the steps I said above in a previous post. Be careful not to get your fingers on your marks or they'll go away. Didn't happen to me, but I was self-conscious about it so it wouldn't happen.